Its almost an year I did my last product shoot. The next was was certainly overdue
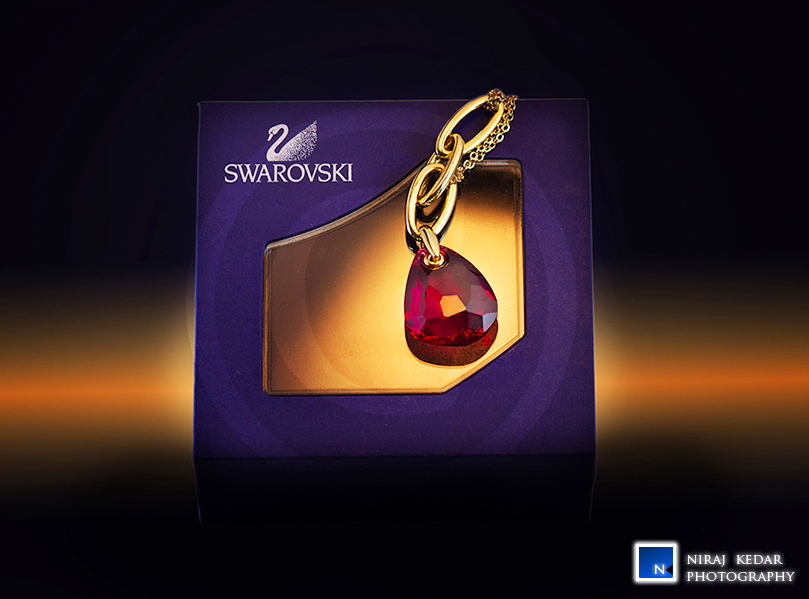
Heres one of ruby in gold pendant from Swarovski. The idea was to get a few shots; one of the pendant and another of the human form wearing it.
I started out with conceptualizing the lighting for the pendant. The pendant is small and I couldnt have used flashes and regular light modifiers. I had to get the red of the ruby to show through and also get enough side lighting on the gold to glitter. So I started out with a white cardboard seamless, placed the case, carrying the Swarovski logo and laid the pendant flat on it with the ruby on the transparent plastic window.
Two A4 size white papers were made to stand on their long side which were for the fill light from the sides. Two LED lights were placed on blocks such that light from them was hitting the A4 paper on their opposite side – left light incident on the paper on the right and vice-versa. This took care of lighting the gold chain, but since the case was deep blue, the red ruby was quite dark. So I took a third light (a handy Maglite tungsten torch) and pointed it up at a white reflector which I held in my hand. This reflected light into the plastic window and lit up the ruby and also provided a golden-orange background to separate the pendant from the background. The camera was on tripod at an angle to the case and pendant, with a RS-80N3 switch.
Heres the final image. I added the orange streak and glow in post processing to match the overall mood.

7D, 85 f1.8 at f/6.3, 1 sec, ISO 250
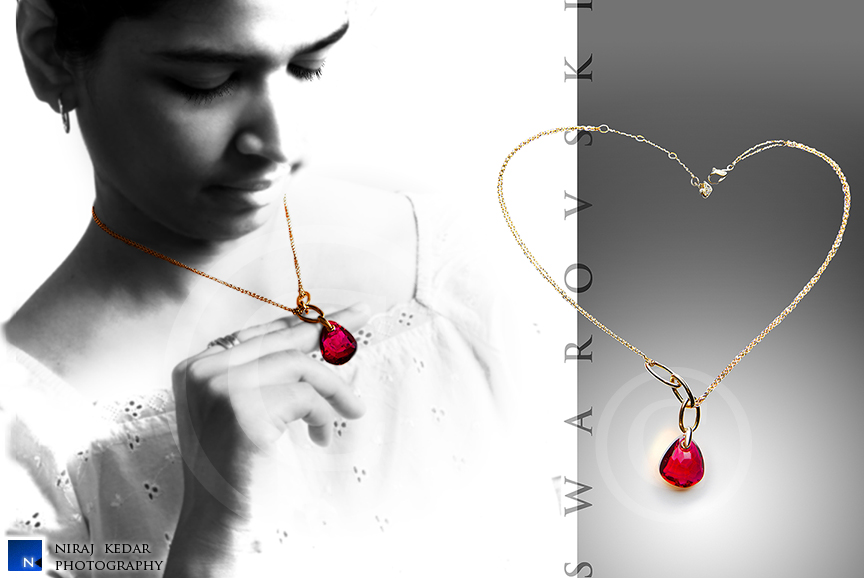
The next image is with the girl wearing the pendent. This setup was not very complicated and I just used the Prolinchrome 23 at half power through a silver reflective umbrella. The silver gave a slightly harder light with sharper transitions which I felt would help the cuts on the pendant. The pendant still was very small compared to her face and I had to crop the final image. The B+W treatment and selective coloring further enhanced the ruby and her expressions and made the image very focused. Heres the final image where I added a separate image of just the pendant on a white cardboard to give it the ‘ad’ billboard feel.

7D, 17-55 f2.8 at f/9.0 1/200, ISO 100
For stuff like jewelry, small continuous lights work best. U may also use a light tent. In this case, I didnt need to as I get by pretty well with material available at home
Hope you liked it…

Pradeep
Awesome Niraj, its sure looks a big pendant
Niraj
thanks Pradeep.. it actually isnt that big.. the 85 1.8 makes it look larger than life
Praveen
Nicely done. Very professional looking. Most importantly, thanks for sharing.
Niraj
Many thanks Praveen…
Chetan L
Very neat, Niraj. It had been a while since I last visited your blog on Lalbagh. I was wondering why you hadn’t updated more…but this is a satisfying write-up. Thanks for the explanation.
Is it possible for you to illustrate your setup with a line diagram, if possible?
Niraj
thanks Chetan.. dont have a diagram of any sort.. the setup was quite simple.. two a4 papers facing each other standing on their long sides. pendant was in between these two. two LEDs from both sides but made to illuminate the opposite side paper. these were kept a lil higher than the pendant box in between and then i was holding a foam core reflector above the setup with a torch pointing at it from under.. the torch was tungsten so u see that orange-yellow glow, instead of the just white.. hope this helps…
do keep visiting…